BB's TT
Forum rules
Each TTOC Member can post one thread to contain a full journal of their TT ownership.
This can be a full blown build thread or as simple as a set of pictures, the choice is yours.
Each TTOC Member can post one thread to contain a full journal of their TT ownership.
This can be a full blown build thread or as simple as a set of pictures, the choice is yours.
-
BrianB
- Posts: 577
- Joined: Wed Dec 16, 2015 7:21 pm
- TTOC Membership: 02935
- Location: Preston, Lancashire
A couple of jobs done today, pipercross panel filter installed and replaced the turbo outlet to charge pipe hose with the forge hose, bit of a pain but with the strut brace removed access is not bad. Forge hose to turbo went on with a bit of a wiggle but had to play with the charge pipe end while off to get it to fit as it is a tight fit but all good in the end.
The remaps getting closer
The remaps getting closer
- Attachments
-
- image.jpeg (891.5 KiB) Viewed 16951 times
-
- image.jpeg (611.71 KiB) Viewed 16951 times
-
- OEM hose not too bad really
- image.jpeg (863.44 KiB) Viewed 16951 times
Mk1 TT225 Coupe 2002
-
BrianB
- Posts: 577
- Joined: Wed Dec 16, 2015 7:21 pm
- TTOC Membership: 02935
- Location: Preston, Lancashire
Just a small thing but the fact that it was missing finally had to get one from Audi !!!
- Attachments
-
- image.jpeg (546.47 KiB) Viewed 16877 times
-
- image.jpeg (856.63 KiB) Viewed 16877 times
-
- image.jpeg (534.95 KiB) Viewed 16877 times
Mk1 TT225 Coupe 2002
-
BrianB
- Posts: 577
- Joined: Wed Dec 16, 2015 7:21 pm
- TTOC Membership: 02935
- Location: Preston, Lancashire
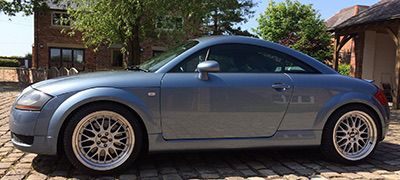
After washing the car thought it was time I treated it to its first polish and some wax since getting it last July!! Used Autoglym super resin polish and Autoglym high definition wax, hard work but definitely worth it 
- Attachments
-
- image.jpeg (819.49 KiB) Viewed 16874 times
-
- image.jpeg (892.49 KiB) Viewed 16874 times
-
- image.jpeg (894.87 KiB) Viewed 16874 times
Mk1 TT225 Coupe 2002
-
BrianB
- Posts: 577
- Joined: Wed Dec 16, 2015 7:21 pm
- TTOC Membership: 02935
- Location: Preston, Lancashire
After speaking to various people and posting a topic on the merits of the different companies offering remaps, I finally made a decision to contact Rick at Unicorn Motor Developments last week and arranged to go over and see him this afternoon.
Two hours later and the remap was done, really good to speak to him and good to know that there were no boost leaks, ignition system was all good and the turbo was spooling really well.
Dyno figures on the low side due to still running winter tyres but happy with the results and have a good idea of what's needed if looking to go further in the future.
Looking forward to driving the car over the coming weeks
- Attachments
-
- image.jpeg (559.31 KiB) Viewed 16870 times
-
- image.jpeg (484.05 KiB) Viewed 16870 times
Mk1 TT225 Coupe 2002


-
BrianB
- Posts: 577
- Joined: Wed Dec 16, 2015 7:21 pm
- TTOC Membership: 02935
- Location: Preston, Lancashire
Having read a lot about jacking the TT using a trolley jack and axle stands I finally got mine up on some axle stands today. This gave me the height I needed to get under the front of the car and replace the damaged under tray.
I have had a replacement for a few months now but it has taken a while to unravel all the opinions and thoughts about where to and how to place jacks correctly to avoid damage to the car and for it to be safe enough to be under to do any work.
It will certainly be a lot quicker next time and I am already looking at what will be needed to sort out my deactivated headlight washers and perhaps a front mount intercooler.
- Attachments
-
- New under tray finally fitted!!!!
- IMG_1467.JPG (588.95 KiB) Viewed 16739 times
Mk1 TT225 Coupe 2002
-
BrianB
- Posts: 577
- Joined: Wed Dec 16, 2015 7:21 pm
- TTOC Membership: 02935
- Location: Preston, Lancashire
Collected my nearside roof rail today from a body shop near me, I'd noticed shortly after getting the TT some corrosion at the front and a little bit in the middle. Took some time and patience to fit the new seals but getting the cover off to get access to the rear attachment screw was probably the hardest part, no mention on how to do this in the Bentley manual!!!
- Attachments
-
- IMG_1473.JPG (727.66 KiB) Viewed 16732 times
-
- As it came from Audi
- IMG_1452.JPG (423.08 KiB) Viewed 16732 times
-
- After painting
- IMG_1468.JPG (472.17 KiB) Viewed 16732 times
Mk1 TT225 Coupe 2002